People and Studio users
See who uses Cortex Control, deactivate people, erase their usage, give builders access to Studio and set their monthly budgets.
Two lists in Settings cover the people side of Cortex: Control users, everyone who has signed in to Cortex Control, and Studio users, the people who may build in Studio and the budget each of them may spend. Who may create what, and which requests wait for an admin, is in other pages: see Builder permissions and policy and Approvals.
Who can do this
Admins of Cortex Control. Admin itself is an Entra app role: you give or take it away in Entra, not inside Cortex Control.
Control users
Open Settings and choose Control users (under People & access). The page lists everyone who has signed in to Cortex Control.
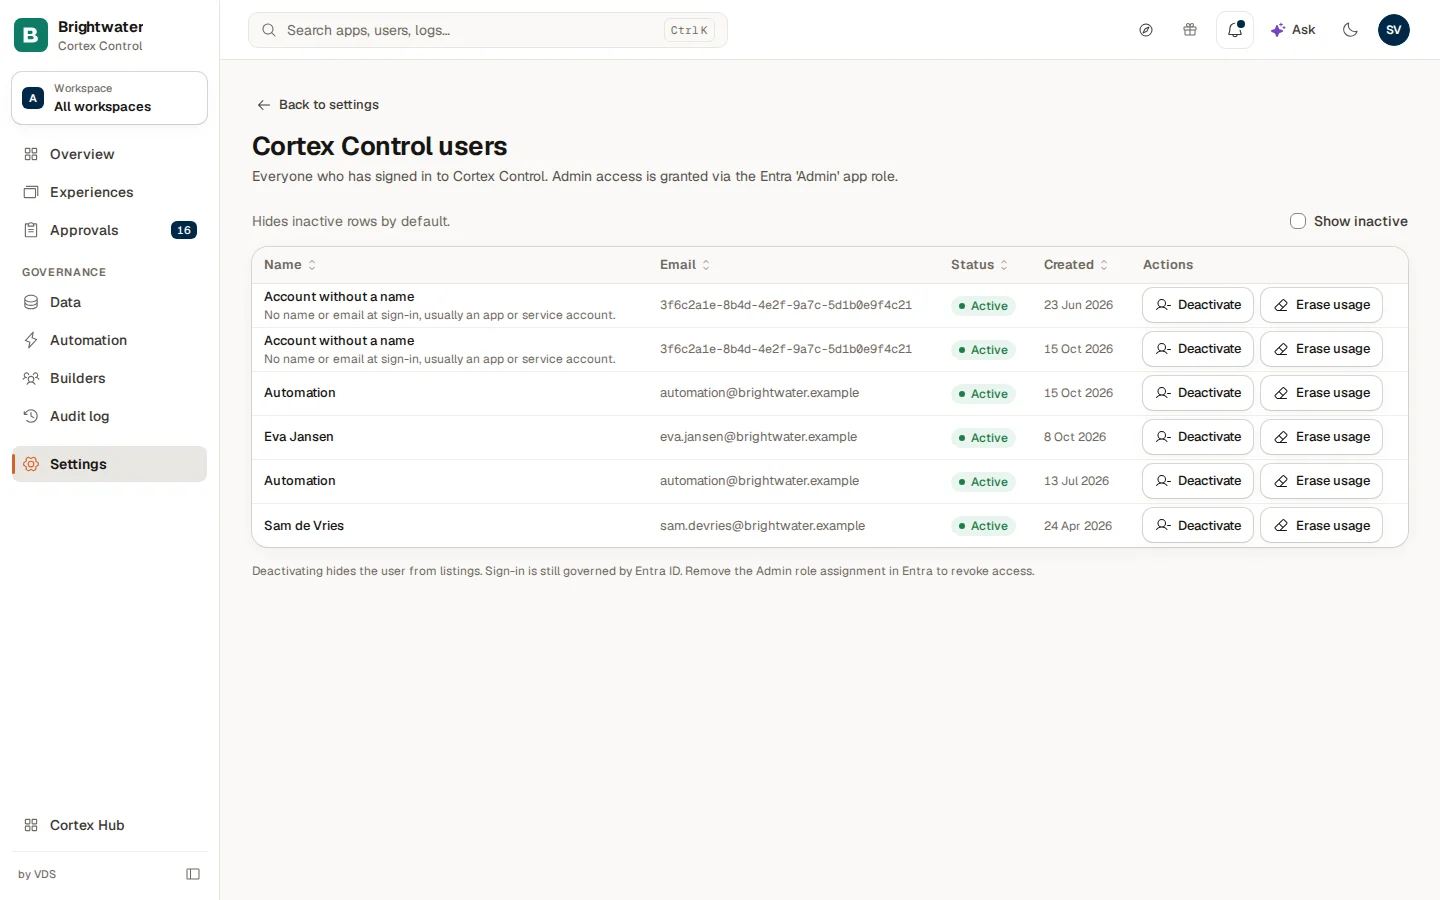
The table has five columns. A column title with arrows sorts the list.
| Column | What it shows |
|---|---|
| Name | The person's name. A sign-in without a name shows Account without a name with the note "No name or email at sign-in, usually an app or service account." |
| The e-mail address from Entra. An account without one shows its Entra object id instead. | |
| Status | Active or Inactive. |
| Created | The date the account first signed in. |
| Actions | Deactivate (or Activate) and Erase usage. |
Inactive people are hidden by default ("Hides inactive rows by default."). Tick Show inactive to see them.
Deactivate or activate a person
Find the person
Open Settings, then Control users. Use the arrows in a column title to sort, or tick Show inactive to find someone who was deactivated.
Deactivate
Choose Deactivate on the person's row and confirm ("Deactivate …?"). A message says "User deactivated".
Bring the person back
Show the inactive rows and choose Activate on the row.
Deactivate only hides the person from listings in Cortex. Signing in is still decided by Entra. To take away access, remove the Admin role assignment in Entra.
Erase the usage of one person
Use Erase usage on the person's row when someone asks for their usage data to be removed. The dialog "Erase the usage of …?" says what goes and what stays.
| Is deleted | Stays |
|---|---|
| The person's opens of experiences and their recent items, their app sign-ins, their page-view marks and their known group memberships. | Day totals, because they carry no person. Workflow runs, because they are business records. |
The Entra sync adds the group memberships again while the person is still in a granted group. Erasing cannot be undone and is recorded in the audit log. When it is done, a dialog "Usage of … erased" lists how many rows were deleted per kind. A kind that does not exist on your install reads "not on this install".
Studio users
Studio users are the people who may build in Studio. Open Settings and choose Studio users.
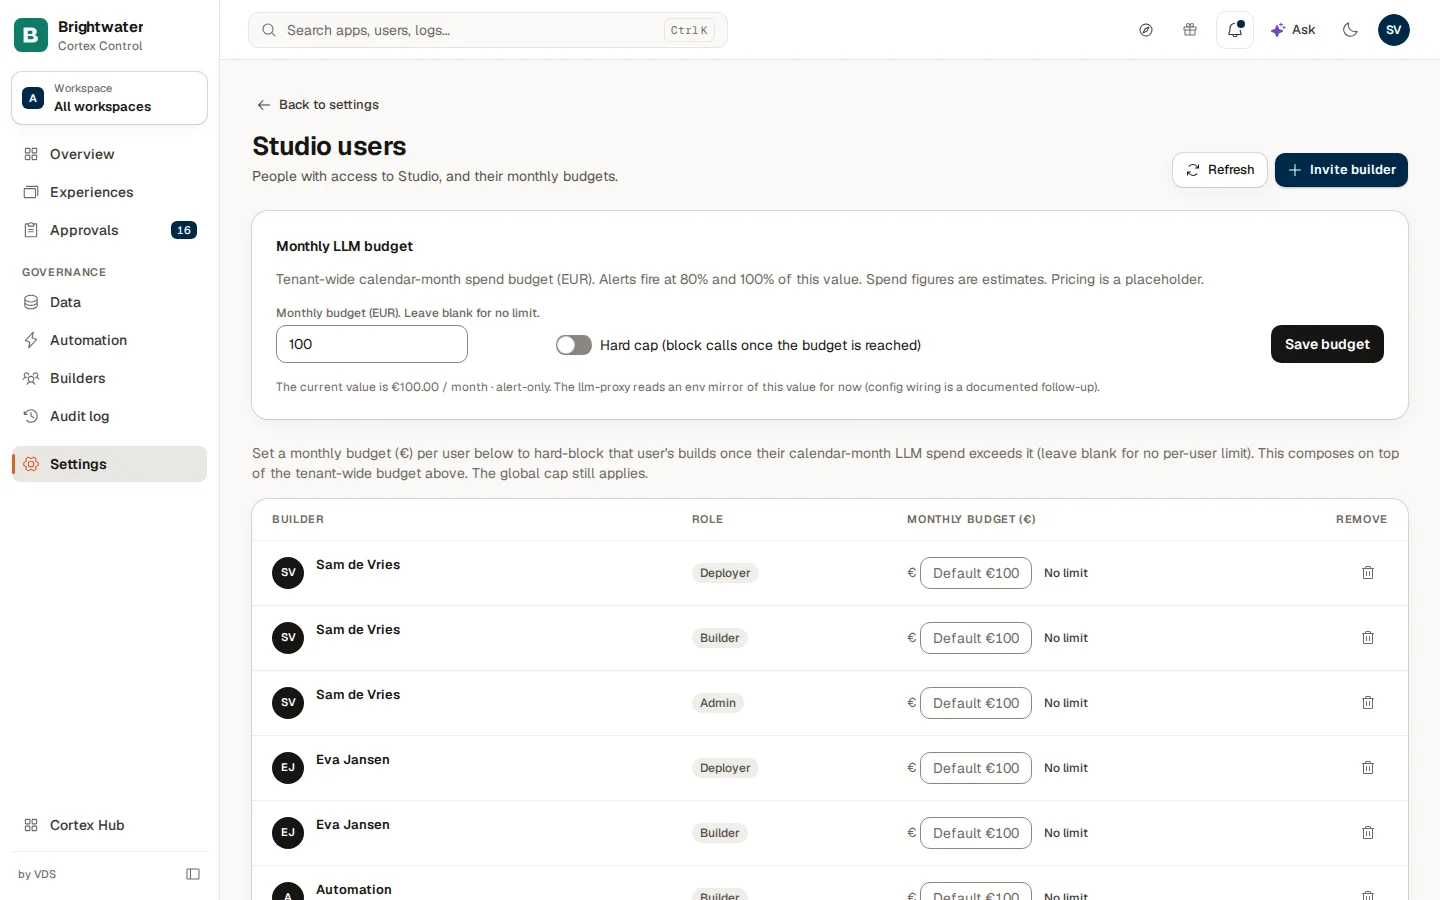
Each row shows the person's name with their Entra object id, their role as a badge, their monthly budget field, and a bin icon (Revoke this role). A person with two roles has two rows. Without any builders the page says "No Studio users yet. Use “Invite builder” to grant one."
Invite a builder
Choose Invite builder. The dialog Add a Studio user asks you to pick a role from the list, then search the person by name or e-mail and select them.
Add the person
Choose Add user. A message says "Added …". You can add several people before you choose Done.
Take a role away
Choose the bin icon on a row (Revoke this role) and confirm in "Remove … from …?". The person loses that role in Studio. An existing sign-in can keep working until it expires, up to about an hour. You can add them again later.
Set a monthly budget for a builder
Every row has a monthly budget field. Type an amount and leave the field, or press Enter, to save. A personal budget blocks that person's builds once their spend for the calendar month passes it.
| Setting | What it does |
|---|---|
| An amount in the field | Hard cap on this person's monthly build spend. |
| Field empty | The default of your organisation applies. You set that default under Settings, Cost & limits (see Cost, limits and usage). A label shows "Default …" when one exists. |
| No limit | Appears when a default exists. It exempts this one person on purpose. |
| Use default | Undoes No limit: "The organisation default now applies". |
The global cap still applies on top of a personal budget. When Studio does not answer, the budget fields are switched off and the page says "Per-user budgets are unavailable"; roles still work.
The budget for the whole organisation
The card Monthly LLM budget at the top of the same page is a different thing: a budget for all of Studio's spend in a calendar month.
- Enter an amount in the budget field. Leave it empty for no limit.
- Turn on Hard cap (block calls once the budget is reached) to stop Studio calls at the budget. Without it you only get alerts at 80% and 100%.
- Choose Save budget.
A line under the card shows the current value and mode, for example "The current value is … per month · hard cap on" or "no budget set · alert-only". Amounts are estimates.
Example: a new builder at Brightwater Foods
Eva Jansen joins the planning team and will build dashboards.
- Sam de Vries opens Settings, Studio users and chooses Invite builder.
- Sam picks the builder role, searches "Eva", selects her and chooses Add user, then Done.
- Eva's row appears with her role. Sam types a monthly budget in her field and presses Enter, so her builds stop at that amount until the next month.
- Three months later Eva moves to finance. Sam chooses the bin icon on her row and confirms. She loses the builder role in Studio.