Roll out Cortex
The first week for an IT admin: branding, workspaces, people and Studio seats, approvals, the AI engine and a cost ceiling, Microsoft Teams, and where people find the docs.
Cortex is installed and you can sign in to Cortex Control. This guide is the first week of Sam de Vries, IT admin at Brightwater Foods, in the order that works: make Cortex look like your company, decide where things live and who may build, set the AI engine and its budget, and tell people where to start.
You end up with a branded Cortex, a workspace per team, a handful of builders with budgets, an AI ceiling nobody can overshoot, Cortex Hub inside Microsoft Teams, and colleagues who know where the docs are.
Branding: name, logo, colour.
Workspaces: who can enter, who can create.
Studio users, seats, builder permissions.
AI engine and the monthly ceiling.
Approvals routine and Microsoft Teams.
The Docs item in the Help menu and the first guides.
Before you start
Who can do this
Admins of Cortex Control. Admin is an Entra app role: you give it in Entra, not inside Cortex Control. For Microsoft Teams you also need your Teams admin, who approves the app in the Teams admin center. For the AI engine you need to know which provider your organisation uses and where its connection details are kept.
The steps
Make it look like your company (IT admin, Settings, Branding)
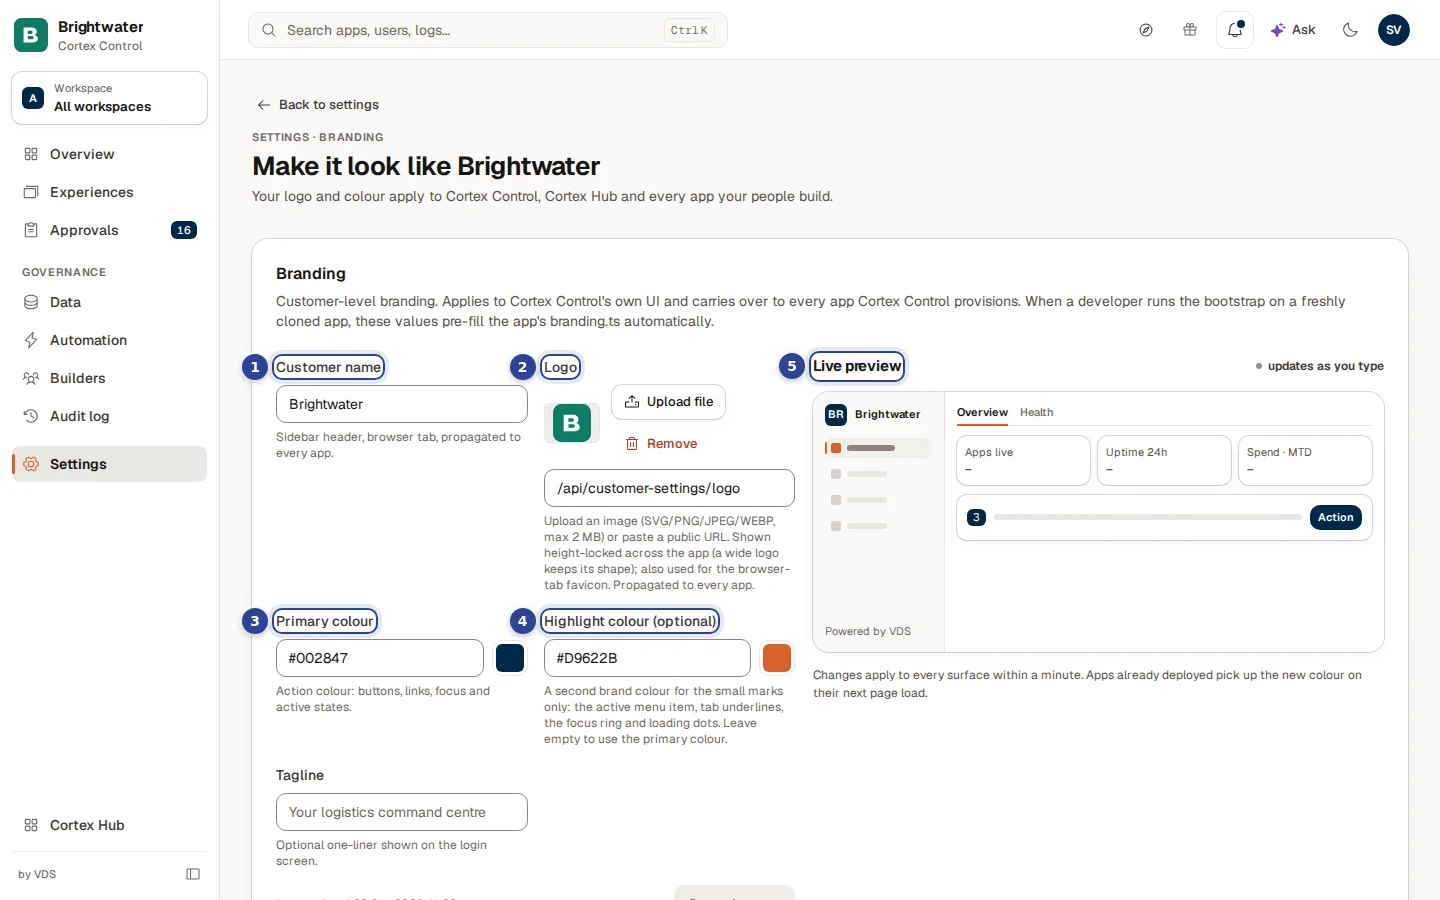
Open Settings, then Branding in the group Organisation. Fill in the Customer name ("Brightwater Foods"), choose Upload file for the logo (SVG, PNG, JPEG or WEBP, at most 2 MB), set the Primary colour and an optional highlight colour, and add a Tagline for the login screen. The live preview follows as you type. Choose Save changes. The logo is stored the moment you upload it. Colours and name apply to Cortex Control, Cortex Hub and every app your people build.
Details: Branding.
Create workspaces (IT admin, Settings, Workspaces)
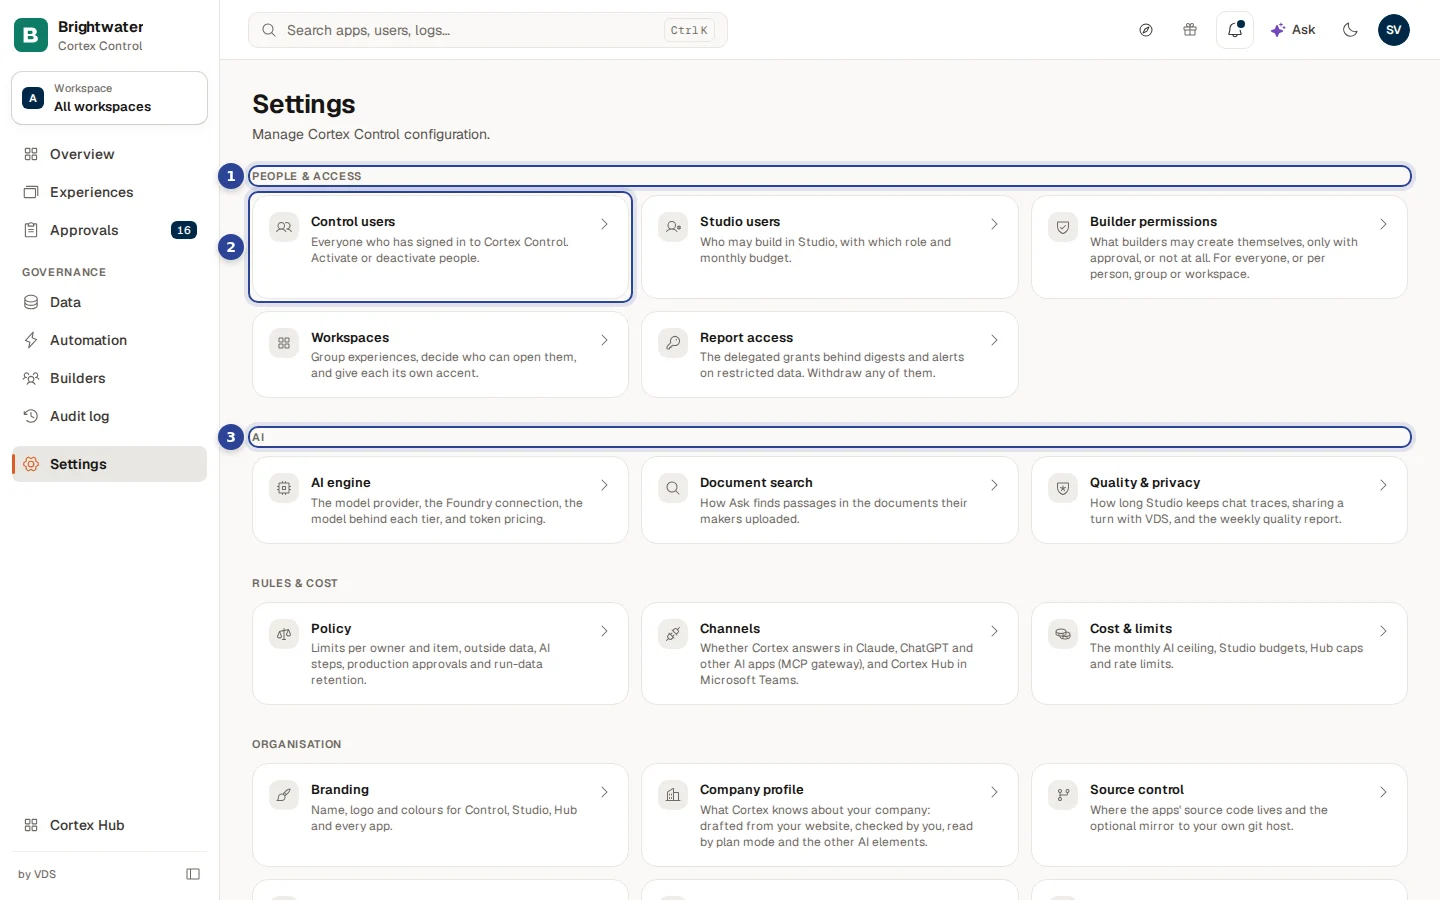
A workspace groups the dashboards, apps and workflows of a team. Open Settings, then Workspaces (group People & access) and choose New workspace. Enter a Name (for example "Production"), set Who can enter (Members only or Whole organisation) and Who can create here (Key users and owners or Any builder), pick an Owner and choose Create workspace. The safest defaults are Members only and Key users and owners. Then open the workspace to add members and groups under Members, and an accent colour under Accent and logo.
Details: Workspaces and the idea behind them in Workspaces.
Invite your builders and set their budgets (IT admin, Settings, Studio users)
Open Settings and choose Studio users. Choose Invite builder, pick a role, search the person and choose Add user. Give each builder a monthly budget in their row, or leave it empty to use the default. The card Monthly LLM budget at the top is a budget for all of Studio: tick Hard cap (block calls once the budget is reached) to stop calls at the budget, and choose Save budget. Seats are counted under the licence: see Licence and seats.
Control users (also in Settings) lists everyone who signed in to Cortex Control. Deactivate hides a person in Cortex but sign-in is still decided by Entra.
Details: People and Studio users.
Decide what builders may do themselves (IT admin, Settings, Policy)
Open Settings and choose Policy. Under "What builders can do" set, per action, Allowed, Needs approval or Admins only: create a workspace, an app, a workflow, a dashboard. Choose Needs approval to keep a hand on new apps at the start: they then land in your Approvals. Here you also decide whether workflows may use AI steps and whether production publishes need a second approver.
Details: Builder permissions and policy.
Set the AI engine (IT admin, Settings, AI engine)
Open Settings, then AI engine (group AI). Work from top to bottom the first time: choose the Provider and choose Save provider; fill in the connection (for Foundry, where it lives and how Cortex signs in, with the key only ever named); choose the model behind each tier, Small, Medium and Large; and set what a million tokens of each cost so that the usage figures add up. The switch EU only keeps your data in the EU. Test after every change.
Details: AI engine.
Set a cost ceiling (IT admin, Settings, Cost & limits)
Open Settings, then Cost & limits (group Rules & cost). Under Ceiling per month type the most your organisation may spend on AI in a calendar month and choose Save. Leave Stop new AI requests at the ceiling on, so the ceiling cannot be overshot: administrators are notified at 80% and at 100%. Set a default Studio budget per person here too, and the limits for Ask. Switching the stop off means you are only warned.
Details: Cost, limits and usage.
Start your approvals routine (IT admin, Approvals)
Open Approvals in the menu. The tab Requests holds what builders ask for: new apps, workspaces, dashboards, data access, integrations and production publishes. Assigned to me holds workflow approvals that wait for you. Decide each card with Approve or Decline and write a reason when you decline: the builder reads it. Every decision lands in the Audit log. Look in once a day at first. The number next to Approvals in the menu adds all three tabs.
Details: Approvals.
Put Cortex Hub in Microsoft Teams (IT admin, Settings, Channels)
Open Settings, then Channels (group Rules & cost) and go to the block Microsoft Teams. When Cortex Control may publish Teams apps, choose Add to Teams. When it may not yet, an administrator who can grant organisation-wide permissions chooses Allow Control to publish Teams apps once. Where publishing is not possible, Download package gives you the package to upload in the Teams admin center. Your Teams admin may have to approve the version there ("Waiting for your Teams admin to approve version …"), and Pin it for people (Teams admin center) puts it in everyone's Teams bar. People then find Cortex Hub under Apps and see three tabs: Home, Inbox and Experiences.
Details: Channels, Microsoft Teams and, for your colleagues, Cortex Hub in Teams.
Tell people where the docs are (IT admin, then everyone)
When your install has the documentation site, every person finds Docs in the ? Help menu in the top right of Cortex Hub (Builder docs if they have a Studio seat; that opens the Studio section of this documentation). It opens in a new tab, in their own language. Control has a Help & docs entry in its own account menu. Send your colleagues a short note: "Start with Getting started in Cortex Hub, then try the guide Answer and follow a figure."
Details: Your account and Find your way.