Connect a new system
IT connects a system and grants a dataset, a builder brings it into a model, adds checks and publishes, and Ask can answer about it.
The sales team at Brightwater Foods keeps its deals in a CRM. Nobody can see them next to the revenue figures, and Ask cannot answer "what is the value of the open deals?". This guide follows the path from a system outside Cortex to an answer in Ask, in the order it happens and with the person who does each step: IT in Cortex Control first, then a builder in Studio.
You end up with a connected source, a dataset a model may read, a certified figure that is checked every night, and Ask answering from it.
IT: install a connector pack or run the New source wizard.
IT: add or check the datasets; builder requests access, IT approves.
Builder: add the table to a model and define a figure.
Builder: certify the figure and add nightly checks.
Builder: publish the model.
Everyone with access: asks a question and gets the figure.
Before you start
Who can do this
Steps 1 to 3 need an admin of Cortex Control. The builder needs a Studio seat and must be an owner of the model. If your organisation switched off data from outside sources in the policy, new connections are refused: see Builder permissions and policy. Someone who manages passwords must provide the credential of the system, and someone in the other system must grant Cortex read access.
The steps
Connect the system (IT admin, in Control)
Open Data in the Governance group of the menu. Choose the route that fits.
Open the tab Connectors. Under Available find the pack of your system, for example HubSpot, and choose Install. In the dialog fill in the Settings, enter the credential (it goes to Cortex's secret store and is never shown again), tick every item under Permissions to grant once it is in place in the other system, and decide about Dev runs. Choose Install. The dialog shows how each dataset did on its first live check: OK or Failed. Choose Done. The datasets of a pack are certified and read-only, and appear on the Datasets tab with a Pack badge.
Details: Connector packs.
Add the datasets (IT admin)
A pack brings its datasets. For a source you made yourself, open the Datasets tab and choose Dataset on the system's header: the window New dataset asks for the Kind (Dataset (read) or Action (write)), the request or statement, the Filter parameters, a test, the Output columns with their Key, and the usage rules (Usage, Sensitivity, Certified number, Access). Choose Create. Builders only see the columns you list.
Details: Datasets and grants.
Request access and approve it (builder, then IT admin)
In the Hub, the builder opens Sources in the Studio group of the left menu and goes to the Datasets tab. Find the dataset and choose Request access in its row menu. Choose the Environment (Development or Production), the app it is for or Not for a specific app, and say why. The request shows as Pending; your Inbox, tab Sent, lists it.
IT opens Approvals, tab Requests. The card shows the badges (read, dev or prod), the dataset, whether it is Certified, the Checks and the Reason. Choose Approve. That approval is the grant. A dataset the builder may use now shows Granted.
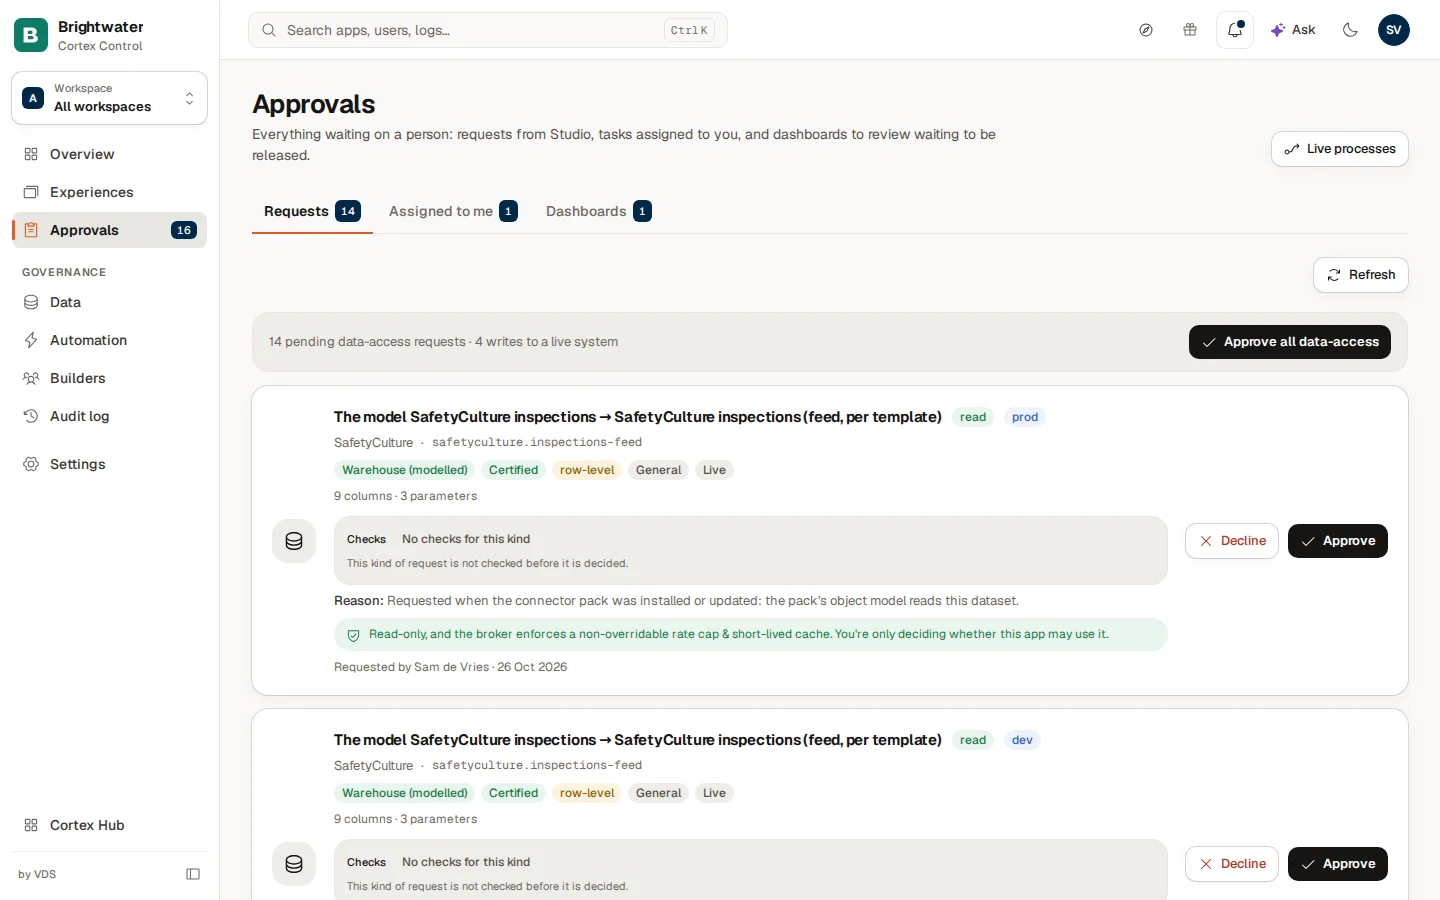
Is the system not listed at all? On Sources, choose Request a source and describe the system you need.
Details: Documents and sources and Approvals.
Bring the dataset into a model (builder, in Studio)
Open Models and open the model for the subject, or choose New model. On the Model tab choose Add and then Add table: "Pick a source, open a schema and add a table to the draft." Select the table, read the properties (display name, Description, Table type, Key fields) and mark fields that contain personal data. Relate it to your other tables by dragging from one field to another and choosing Create relationship. Nothing leaves the draft until you publish.
Details: Semantic models.
Define a figure and certify it (builder)
On the Figures tab choose New figure or describe it in words ("Open deal value: the sum of the amount of deals that are not closed"). Check the Preview, choose Save figure, open the figure and choose Run the reference check. When the result is Matches, choose Certify. If Cortex cannot build a reference for a figure by itself, it says so and asks you to add a verified question with a reference total first.
Details: Figures and certification.
Add checks (builder)
On the Checks tab choose Add a check. Four kinds are offered: Compare with the source, Count the records, A rule the data must follow and Compare with another table. Choose what happens If it fails: Only show it, Tell the owners or take the badges off. Every night Cortex checks the published model again: is the data still arriving, are the tables sound, does each certified figure still match the source?
Details: Model checks.
Publish the model (builder)
Choose Publish in the top bar. Read Changes since the published version and the checks, fix what is Blocking, write a note and choose Publish. Only after publishing do dashboards, apps and Ask see the new table and figure. If you want Ask to use the figure, check that it is approved for AI when your model only offers approved figures: Approved for AI under Security.
Ask a question (everyone with access)
Open Home and ask "What is the value of the open deals?". Ask answers with the figure from your model and the label Certified figure, with the period and the source. When a question is still unanswered ("I don't know that figure yet"), the figure is not in the published model, or it is not approved for AI yet.
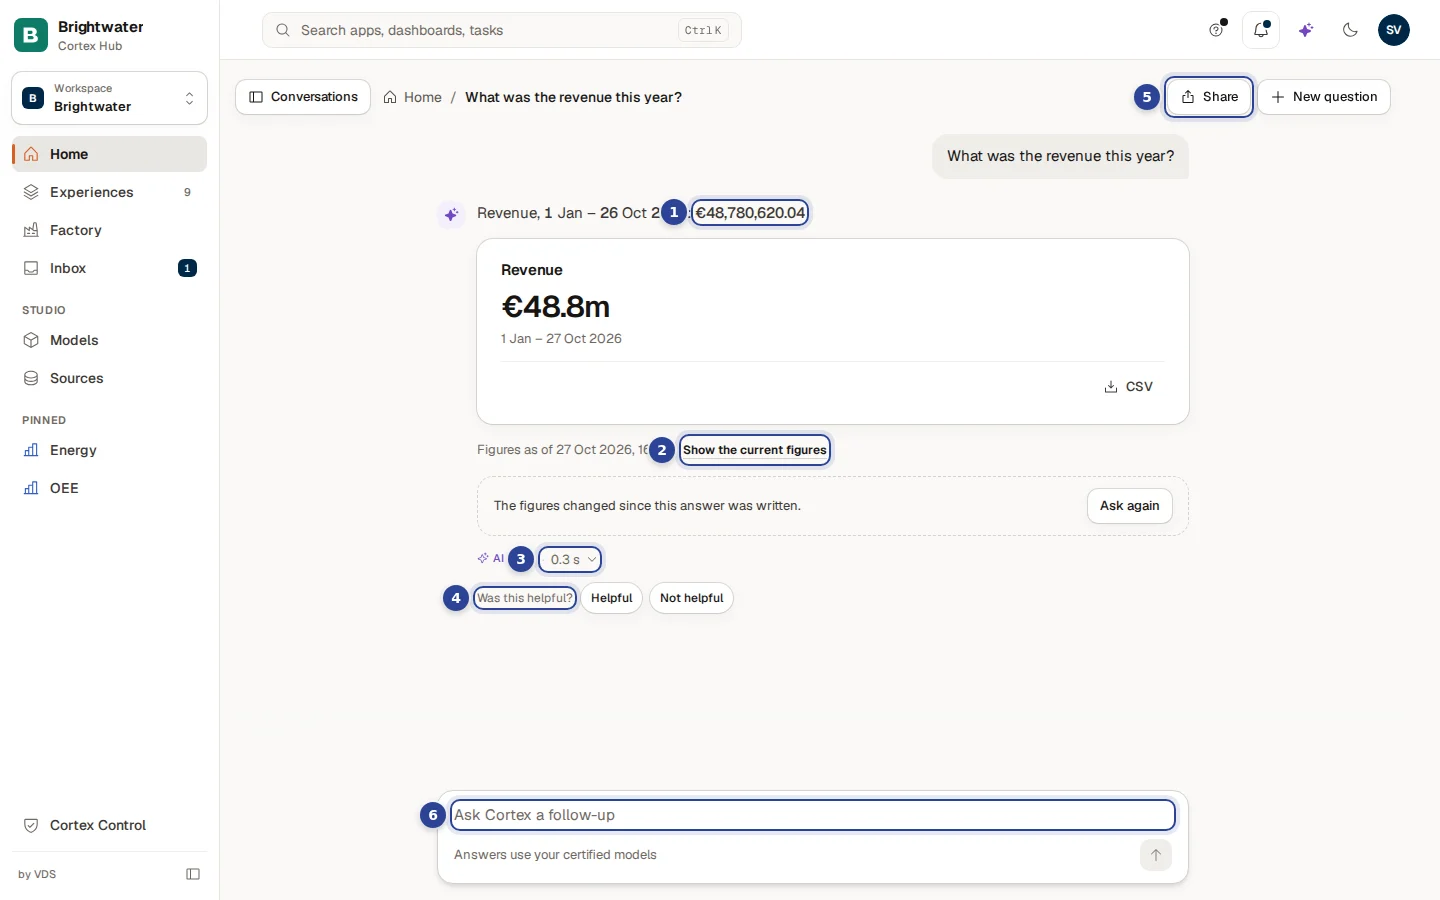
Details: Ask Cortex.
If something does not work
What next
Automate an approval
Build an order-approval workflow, test it, publish it, let a manager approve in the Inbox and follow the run, with IT keeping an eye on it.
Roll out Cortex
The first week for an IT admin: branding, workspaces, people and Studio seats, approvals, the AI engine and a cost ceiling, Microsoft Teams, and where people find the docs.